스프링 JUnit을 사용해서 MySQL delete문 테스트 방법입니다
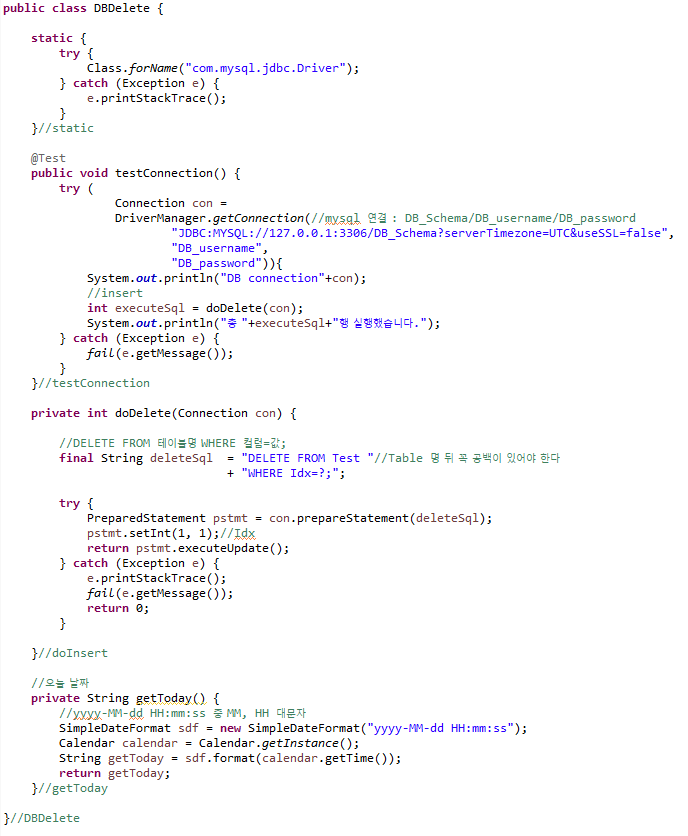
코드 완성 예입니다
스프링 기본 예제 프로젝트 생성 시 기본적으로 JUint이 추가되어 있습니다
pom.xml 설정과 코드 작성 시 바로 mysql 연동을 확인할 수 있습니다.
1. pom.xml
dependencies 안에 mysql-connector-java dependency를 추가합니다
<dependency>
	<groupId>mysql</groupId>
	<artifactId>mysql-connector-java</artifactId>
	<version>8.0.16</version>
</dependency>
2. JUint 패키지 생성 및 class 생성
스프링 src/test/java 경로 아래에
DBInsert 이름의 class 파일을 만듭니다
public class DBDelete {

	static {
		try {
			Class.forName("com.mysql.jdbc.Driver");
		} catch (Exception e) {
			e.printStackTrace();
		}
	}//static

	@Test
	public void testConnection() {
		try (
				Connection con =
				DriverManager.getConnection(//mysql 연결 : DB_Schema/DB_username/DB_password
						"JDBC:MYSQL://127.0.0.1:3306/DB_Schema?serverTimezone=UTC&useSSL=false",
						"DB_username",
						"DB_password")){
			System.out.println("DB connection"+con);
			//insert
			int executeSql = doDelete(con);
			System.out.println("총 "+executeSql+"행 실행했습니다.");
		} catch (Exception e) {
			fail(e.getMessage());
		}
	}//testConnection

	private int doDelete(Connection con) {

		//DELETE FROM 테이블명 WHERE 컬럼=값;
		final String deleteSql	= "DELETE FROM Test "//Table 명 뒤 꼭 공백이 있어야 한다
								+ "WHERE Idx=?;";

		try {
			PreparedStatement pstmt = con.prepareStatement(deleteSql);
			pstmt.setInt(1, 1);//Idx
			return pstmt.executeUpdate();
		} catch (Exception e) {
			e.printStackTrace();
			fail(e.getMessage());
			return 0;
		}

	}//doInsert

	//오늘 날짜
	private String getToday() {
		//yyyy-MM-dd HH:mm:ss 중 MM, HH 대문자
		SimpleDateFormat sdf = new SimpleDateFormat("yyyy-MM-dd HH:mm:ss");
		Calendar calendar = Calendar.getInstance();
		String getToday = sdf.format(calendar.getTime());
		return getToday;
	}//getToday

}//DBDelete
주의사항
final String updateSql 변수에서 "DELETE FROM Test "에 공백이 있는 이유는 문자열이 합쳐질 때
공백이 없으면 "DELETE FROM TestWHERE Idx=?;"같은 형태가 되기 때문에 공백을 줬습니다
127.0.0.1:3306 : MySQL 설치 경로입니다 본인의 환경에 맞춰서 변경하면 됩니다
DB_Schema : DB 스키마로 MySQL내의 데이터베이스 생성한 이름입니다
DB_username : 유저명으로 MySQL 설치 시 생성한 유저명을 적습니다
(DB 스키마에 맞는별도의 유저명을 생성하지 않은 경우 보통 root)
DB_password : 유저명의 비밀번호입니다
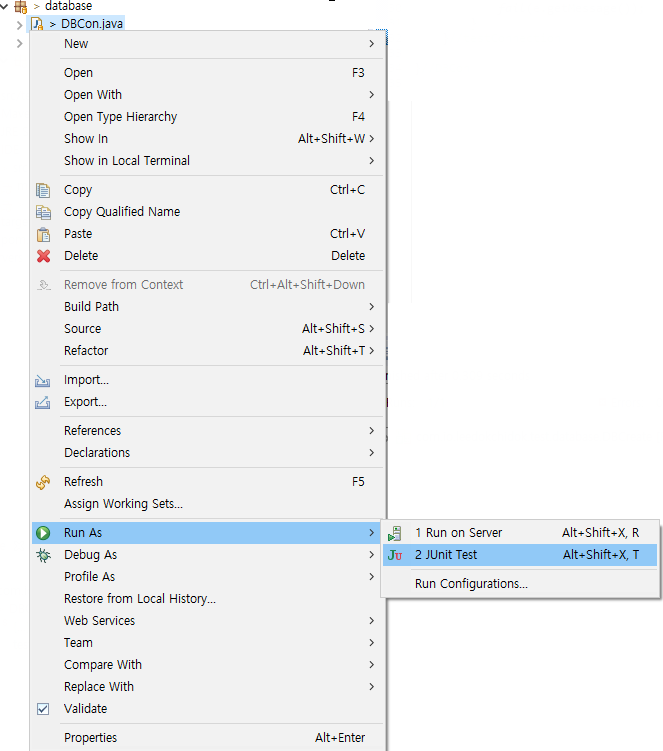
3. JUnit 실행 방법
DBCon 선택 -> 마우스 우클릭 -> Run As -> JUnit Test
'JAVA > STS(SpringToolSuite)' 카테고리의 다른 글
| [STS] Spring Properties 파일을 이용해서 DB 정보 분리하는 방법 (0) | 2022.02.04 |
|---|---|
| [STS] 스프링 JUnit으로 MySQL Update 예제 (0) | 2021.08.27 |
| [STS] 스프링 JUnit으로 MySQL insert 예제 (0) | 2021.08.23 |
| [STS] 스프링 JUnit으로 DB Connection 예제 (0) | 2021.08.20 |
| [STS] 스프링 패키지 이름 오류 (0) | 2021.08.09 |


